Wednesday, August 22, 2012

Flower Garden Blanket

The Ever Changing Blanket ! 
"Beyond the Square" by Edie Eckman


Some of you might remember in my WIP Challenge blogs from April 2012 that one of the projects was a blanket with crocheted motifs joined with Freeform.  This was a project that sat buried in a bag in my office for over a year, lost among all my other WIP (work in progress) crochet projects. Wah !

The original idea is a series of 18 inch by 18 inch panels crocheted together to make blanket. I LOVE the motifs in Edie Eckman's  "Beyond the Square Crochet Motifs".  I wanted them to look like pieces of colored glass sitting crushed white rock, like a mosaic. Freeform was to be the mortar that held these lovely motifs together.


Color !
 I picked out a palate of colors using Brown Sheep Nature's Spun worsted weight yarns

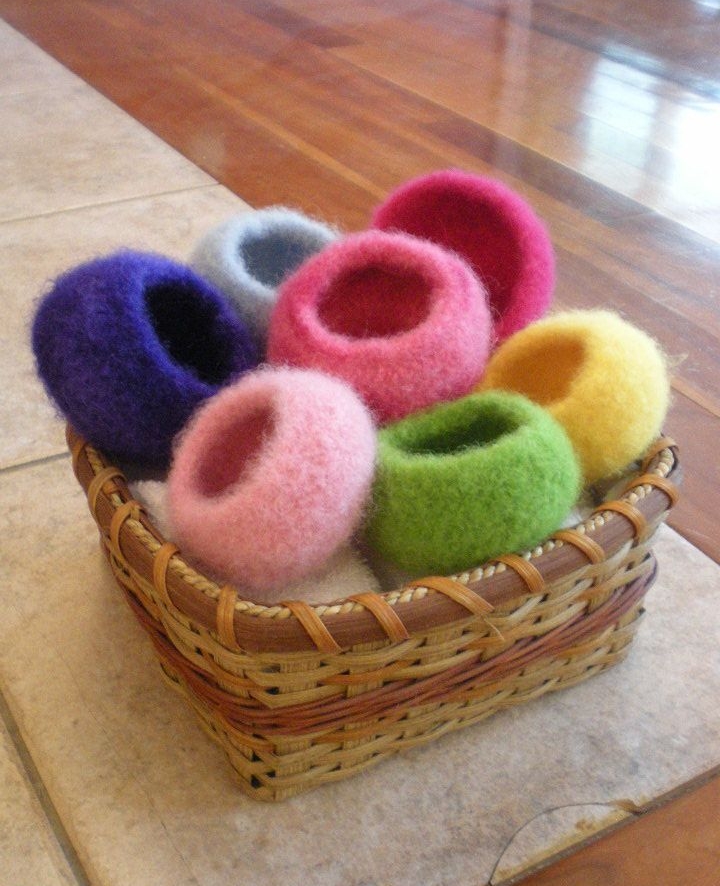
Top Row: Limestone, Boysenberry, Regal Purple

Middle Row: Peruvian Pink, Victorian Pink, Purple Splendor, Cherry Delight

Bottom Row: Bit of Blue, Impasse Yellow, Elf Green.

Not shown: Spring Green and Snow.


Because of the WIP Challenge, I finally got it organized and made up my mind as to how I'm going to go about crocheting this and putting it together. Or so I thought. Since WIP Challenge, I've changed my mind a half dozen times as to what it's going to be. I've scrapped the original motifs connected by freeform several times. I've decided to make a granny stripe blanket, skip the blanket all together and make a sweater out of the yarn or just stash the yarn for later use....... you're getting the picture.


But I keep coming back to motif / freeform idea, so that must mean something.  I have cut the size though and I don't think that's going back up. It was going to totally cover the top of out bed, then it was going half way, then a third. Lately I've been toying with the idea of just a strip of color at the bottom of the bed. Hmmm....  But seriously, I'm looking at making something big enough to cover a third of the bed.

Lovely confusion


I've finally got enough motifs crocheted to make up the first panel.


Layout board with pinned motifs


Here is my layout board for the first panel ! I even have a bit of the joining crochet started.

Check here to see how I set up my layout board.


One of the motifs is missing cause it needed an extra blocking.


Update - September 2015 !!

I finished this a year ago in September 2014 - I lost interest in making a full sized blanket out of it and turned it into a throw sized blanket.

I did a deep border using the colors in the motifs. It wound up being about 40 inches by 40 inches. Sweet !


Freeform Layout Board

My Freeform Bag
Sometimes, when putting together your scrumbles you'll want to lay them out in a certain order to crochet them together.

A good book for information about how to set up freeform projects is "Creative crochet lace : a freeform look at classic crochet" by Myra Wood.

You can assemble your pieces on paper or fabric. You need to have your template be the size you want you overall project to be.

A piece of paper works just fine for smaller projects. I built the freeform bag around a purse I already had. I copied the sides, back, front and flap dimension on paper and then laid my scrumbles down on the templates as I crocheted them or stitched them together.


 Here is how I made my layout board for my Flower Garden Blanket.

18 inch by 18 inch cardboard

I decided I wanted to pin my motifs down so I used a fabric covered base.  I used cardboard for my base.

I wanted an 18 inch by 18 inch block for the blanket panels, so cut my cardboard out to size.


Cardboard on the old sheet.

Then I laid out an old sheet, put the cardboard on top of it ...


Fabric cut out just a bit bigger than cardboard


and cut the sheet out to be just larger than the cardboard template.


Fabric taped to back of cardboard


I folded and taped the fabric to the backside of the cardboard. I used packing tape.


Fabric covered layout board with motifs pinned on


My layout board is finished !

Saturday, August 18, 2012

Felted Bowls

Easy Felting !!

Basket of color

I’ve done a little bit of felting and am beginning to get the hang of it. I think a great way to get your feet wet is to crochet these Simple Felted Bowls, designed by Lauren Housley

I finished up these bowls several weeks ago and finally got around to taking some decent pictures.

Brighten up your day !
The yarn is Brown Sheep Yarn's, Nature Spun worsted weight. They have a nice color selection. It also felts up very well.

These bowls are super fast and easy to crochet. Took me a little over an hour to crochet one. Then I tossed it into the washing machine along with a little soap and the felting turned out great !

 I had to run the agitator for about 40 mins to get the level of felting I wanted. For me, that means running the heavy duty wash cycle 3 times in a row and then letting washer finish up through the rinse/spin cycle.


 The pictures below of the single pink bowl show what it looked like  not-felted and then felted.


Not Felted

Felted !!
They were addicting !! I crocheted more bowls for a lovely basket of color and because I couldn’t stop making them !


Thursday, August 9, 2012

Iowa State Fair 2012

State Fair Results are in !!
My green/yellow Toddler Dress

I've been entering crochet projects in the Iowa State Fair for the last several years.  I put in 6 pieces this year.

The fair holds a preview for the Fabric and Threads exhibit before the fair opens. I got my invitation and went last night to feast my eyes on crochet goodies and loads of other needle crafts !!

I almost didn't make it !! There was a giant thunder storm boiling it's way through Des Moines yesterday afternoon and if my husband hadn't been driving, I would have turned tail and driven all the way back home.

Wind and rain lashed the car as we drove the last bit on the freeway and the tornado sirens started going off as we got down to the surface streets. Great ! Where in the heck are we ??  No place to take shelter !! and NONE of the radio stations had any announcements as to what's going on.  So we kept driving and got to the fair with buckets of rain pouring down. One good thing from the storm was that none of the guards were out at the gates so my husband drove me onto the fair grounds and right up to the door of the building I was going to. I only got a few drops on me. Sweet !

3rd Place - Felted Heart Shaped Bag


It was worth it to be there. So much creative excitement. My only woe was there was not nearly enough crochet ! But there were plenty of quilts, sewing, knitting, weaving and other hand made delicacies to fuel my creative gas tank !

 I found I got a few ribbons this time around.

3rd Place for my Felted Heart Shaped Bag ! The 1st and 2nd place felted items were just beautiful, so nice to think my bag was included !


Hon. Mention - Freeform Scarf


My Freeform Scarf got an Honorable Mention ! I didn't expect any award because Freeform is not very well known and wasn't sure the if judges would be familiar with it.

The scarf is bunched up with some other scarves here in the middle of this picture. It's in there, I swear ! Too bad the ribbon is hanging down over the scarf so no one will get to see much of the design. Oh well.


3rd Place - Sweater Vest


Another nice surprise was 3rd place for my Sweater Vest. It's a very simple design and I wasn't sure if  it would compete well, so I was jazzed to see it got 3rd place !!

There were several really nice crochet sweaters.  Next year I have in mind to do a cardigan style sweater with lots of color changes in the yarn, sort of a Fair Isle effect. We'll see !


Tunisian Sampler - folded middle


My only disappointment was no award for my Tunisian Sampler Shawl.  Of the 6 pieces entered, I thought this one was the best of the lot.  Plus they had it folded up in such a way that none of the stitch work showed up. There is a lovely stitch combination in the middle that I was super excited about, but you just get a peek at it. I was temped to crawl under the barricade and
refold it !

However there were loads of entries in the shawl category and the ones that placed were lovely. One of my online friends got a ribbon for her beautiful shawl ! Good Job !


Double Rainbow !

Then, for a special treat after that brawling storm, we got to see a double rainbow on the drive home !!


It was spectacular !! Double all the way across and the inner rainbow was so intense it almost hurt your eyes.

We were driving east so we got to enjoy it for a long time.

Sunday, May 20, 2012

Swirling Spirals Baby Hat


Here is another crochet hat for the Click for Babies project.

Swirling Spirals Baby Hat
By Katy Diltz

An easy double crochet baby hat that will be a snap to make.  Finish it off with a neat ribbed brim and you’re all set for a quick baby gift.


Newborn baby sized hat: with the hat lying flat, 
Hat height should measure about 5.5 – 6 inches (13 – 15 cm) from the brim to crown.
Hat width 6 – 6.5 inches (16.5 – 18 cm) measured across the brim.  
Adjust your yarn or hook size to get the proper size.

Stitches are USA English:
ch – chain
sl st- slip stitch
sc – single crochet
dc – double crochet
fpdc – front post double crochet
bpdc – back post double crochet

This hat is worked in a spiral so don’t join until you work the brim.
Materials:
1.5 oz Baby weight or DK weight yarn 
            (I used Cascade 220 Superwash Sport)
G hook (4.25 mm) for hat
F hook (3.5 mm) for brim-ribbing

Pattern:
Hat – use larger hook
Round 1:
Ch 3, 9 dc in 3rd chain from hook (10 including chn 3)

Keep track of your rounds by putting a stitch marker in the first stitch of each round

Round 2: 2 dc in 3rd, 2 dc in each st around (20).

Round 3: *1 dc in next st, 2 dc in next st* repeat around. (30)

Round 4: *1 dc in the next 2 st, 2 dc in next st* repeat around. (40)

Round 5: *1 dc in the next 3 st, 2 dc in next st* repeat around. (50)

Leave your stitch marker in the first stitch of Round 5. This will let you know when you’ve reached the beginning on the other rounds.

Round 6-11: dc in each st around.  (50)

Round 12: dc in each st around, finish with hdc, sc, sl st, sl st. (50)

Brim – Ribbing – switch to smaller hook
Round 13: sc in each st around. Join with sl st to 1st sc. (50)

Round 14: dc around in each sc. Join w/ sl st to first dc. (50)

Round 15: fpdc around first dc, bpdc around next dc, repeat around the brim. Sl st into first fpdc. (50)

Cut yarn and weave in the tails.

This picture shows the spiraling
and Front/Back Post Double Crochet ribbing for the brim.


copywrite 2012 Katy Diltz
You may not resell this pattern in whole or in part or claim it as your own. You may sell items created from this pattern locally or online. Please give me credit as the designer.


Thursday, May 17, 2012

Tumbling Blocks Baby Hat

I'm crocheting hats for Click For Babies

I've worked up a baby hat using one of my favorite stitches, the Brick Stitch ! Let me know if you like it !


Tumbling Blocks Baby Hat
Designed by Katy Diltz


A cute baby hat using a stitch pattern that has several names; Brick Stitch, Crazy Shell, Diagonal Box stitch, and Crazy Stitch to name a few. In this pattern we’ll call it the Brick Stitch cause the design of the hat makes it look like alternating brick pattern, or tumbling blocks !


Newborn baby sized hat: with the hat lying flat, 
Hat height should measure about 5.5 – 6 inches (13 – 15 cm) from the brim to crown.
Hat width 6 – 6.5 inches (16.5 – 18 cm) measured across the brim.   
Adjust your yarn size or hook size to get the proper size.

Turning you work after each round will give the tumbling blocks effect.

Stitches are USA crochet abbreviations

Brick Stitch Patterns:
Brick stitch pattern #1 (BS1) is (single crochet, chain 2, 2 double crochet) all in the same stitch.

Brick stitch pattern #2 (BS2) is (single crochet, chain 2, 3 double crochet) all in the same stitch.

Other Stitches:
ch – chain
sl st- slip stitch
sc – single crochet
dc – double crochet
fpdc – front post double crochet
bpdc – back post double crochet

Materials:
2 oz Baby weight or DK weight yarn
            (I used Cascade 220 Superwash Sport)
G hook (4.25 mm) for hat
E hook (3.5 mm) for brim-ribbing

Pattern:
Hat- use larger hook
Round 1:
Ch 4, do 9 dc in 4th chain from hook, join w/ sl st (10)

Round 2: Ch 3 (counts as first dc), dc in same st, 2 dc in each st.
Join w/ sl st (20). Turn work

Round 3: Ch 3 (counts as first dc), 2 dc in next st, **1 dc in next st, 2 dc in next st** – repeat.
Join w/ sl st. (30) Turn work

Round 4: Ch 2, 2 dc in same stitch, skip the next stitch, **BS1 in next stitch. Skip the next stitch ** Continue this pattern around. Join w/ sl st in the beginning ch 2 space. (15 BS1) Turn work

Round 5: Ch 2, 3 dc in same stitch. BS2 around working in the ch 2 loops of the row below. Join w/ sl st into the beginning chain 2 space. (15 BS2) Turn work

Round 6-11: Repeat round 5. Turning work after each round. (15 BS2)

Round 12: Repeat round 5. Don’t turn work. (15 BS2)

Brim - Ribbing - switch to smaller hook
Round 13: ch 3, dc in the next dc and around in each dc and the ch 2 space.
Join w/ sl st to first dc. (60)  Don't turn work.

Round 14: fpdc around first dc, bpdc around next dc,
repeat around the brim. Sl st into first fpdc.

Cut yarn and weave in the tails.

This picture shows the alternating Brick Stitches
and Front/Back Post Double Crochet ribbing for the brim.

Copywrite 2012 Katy Diltz.
You may not resell this pattern or claim it as your own. You may sell items created from this pattern locally or online. Please give me credit as the designer.


Sunday, April 29, 2012

Freeform Scarf

This is the 2012 Freeform (FF) CAL (crochet along) that I did with a Ravelry group for International/National Crochet Month  (IntNatCroMo) !

I did the FF CAL last year and made a purse out of my scrumbles. I really enjoy the process of FF and thought that I'd be doing much more of it over the course of 2011. However, I did not get back to it till March 2012 when a whole new IntNatCroMo party hit the scene !

So there I was, starting out on another FF adventure. We get a new set of instructions every day of the month. You have a fair bit of license to do what you want with the instructions. Some bug whispered in my ear to do a linear FF project this year, so no curves.  That sounded neat on Day 1, but by Day 15 I was totally tired of having to reinvent the wheel for every set of instructions. Seems like most FF naturally lends itself to curving. And some of the instructions were about curving, spirals, flowers. So I had to double figure out most of the instructions to fit my linear goal. I completely bogged down and decided I wasn't going to finish this year's FF at all (trash bin time !!)

Thankfully another of my Ravelry groups had a "Finish Your WIP"(work in progress) contest in for April and I decided I was going to get my scarf done !!  I got revitalized, and with much kind encouragement from the IntNatCroMo, I got through it. You can follow my total progress on my Ravelry.com project page. I'm DZKat over there. 

Here are a some pics of the finished project and a couple glamour shots thrown in !

Since this was a scarf, I was challenged on how to photograph it. Finally took pictures of it in pieces.
The Ends


Near Ends
The Middle

The Artist as a Model

Over the Shoulder

April WIP Challange - Final Update

Today is the last day of April and my WIP challenge is drawing to a close. I didn't get everything finished that I wanted to, but all in all was good to get some of them out of my hair. I've got 3 more left. Two for sure I'll finish up in May and my Garden Blanket, I hope to be done with in time for the State Fair this summer.

Kyo Backpack - January 2011
Not Done - This is part of my Costume for Anime Iowa this summer. Good that I got it out and am working on it. Will finish this by the end of May.


Spirited Away Duck - April 2011
Done !! So cute !!


Flower Garden Blanket - August 2011
Not Done - Still a lot of work to do on it, but achieved my goal of getting it sorted out. Now I can work on it and hopefully get it done in time to enter in the State Fair this summer

Cat-Toy Belt - October 2011
Done ! This is also part of the same costume for Anime Iowa this summer.


Cat-Ears Wig - November 2011
Not Done - I didn't even get to it. :-(  But my goal is to get it finished by the end of  May !

Checkered Tote - March 2012
Done !!  Did this as a part of a CAL for the Friendship Crochet Club !

NatCroMo FF CAL - March 2012
Done !!!  Yea !!! I love how this turned out !

Tuesday, April 17, 2012

Progress Update

April is half over and I am not getting as much done with my WIP (work in progress) challenge for my Ravelry group as I thought I would !!! O_o

I know I've gotten side tracked on my Flower Garden Blanket (was Freeform Blanket). I finally got it off the ground and I can't stop working on it. Problem is, there is no way I can get it completed by the end of the month (or get any other project done). I bought the yarn for this last August and every time I got it started, I'd change my mind as to how I was going to do it. Then I'd get frustrated and ignore it for several months.

Finding the Up ! meant coming up with a firm plan and downsizing. I realized part of the reason I was stalling was I didn't want to make another full sized blanket for our bed. (I've made full sized blankets for both the kids)  So I am only making this to go across the foot of the bed and not cover the whole thing.  I've got my colors and motifs settled and I'm going to crochet them all together with freeform crochet.

Crocheting my Flower Garden Blanket with Brown Sheep Yarn "Nature Spun worsted" in some Lucy style Colors


and I'm using Edie Eckman's lovely motifs from "Beyond the Square Crochet Motifs"


But I have to put my blanket away for now and get to work on some of my smaller WIPs that have a chance of getting done by the end of April !!!!

My other projects, the duck, NatCroMo FF scarf, cat belt and wig (oops ! I forgot about the cat backpack !) the checkered tote are all in various levels of finishedness and have a chance of being completed by the end of the month, if I'm not distracted with making endless rounds of colorful motifs ! (or baby hats, but that's another story !)

Back to work with more updates forthcoming as I get things done !

Sunday, April 8, 2012

Work in Progress Challenge

Finding the Up ! It will make me feel good to get some old crochet projects finished so I don't have to look at them and feel guilty or harried !!

In one of my Ravelry groups, I joined the challenge of no new crochet projects for April. I'm only supposed to work on crochet projects I've had hanging around the house, unfinished.

I don't have am many of them as I thought ! that was nice to find out. However, some of them have been hanging around since last summer and and fall. I really want to get them done.

They are:
Kyo Backpack - January 2011
Spirited Away Duck - April 2011
Freeform Blanket - August 2011
Cat Toy Belt - October 2011
Cat Ears Wig - November 2011
Checkered Tote - March 2012
NatCroMo FF CAL - March 2012

However, that blanket, don't think I'll get it done this month, but I want to get a big chunk of it finished

Oops, I do have a few new projects that I have to start because I'd planned to start them before I found out about the WIP challenge, (a baby hat and a bunny !) but those will be the only new ones this month.

Wish me luck !